Building the Arcade Dream, Part 2
There is plenty of mystery surrounding the homemade arcade cabinet scene; until you get under its skin. Wherever you live there will be local knowledge and country related forums. This is as true in Australia as it is elsewhere. On the way to picking up and deciding on which cabinet I was going to tackle first I came across lots of useful resources. In Part 1 I discussed finding my project, in Part 2 I’ll share resources and the first steps.
Google and Youtube are absolutely your friend, especially if you’re an okay-ish handyman like myself. Last time out I mentioned that I had bought plans and access to the Geekpub collection, their video was a great starting place, even though I didn’t ultimately like the cabinet style.
There’s a World of information out there.
Two key sources I keep coming back to are the Sydney based Chaos Foundry and Canadian based Retroactivearcade. Trawling through both of these sites’ very helpful Youtube videos has given me more insight into the process than I could ask for.
Especially noted if you watch the Chaos Foundry videos by Abs DelFuego, this is a hands-on builder with over 20 years experience. He runs Arcade Cabinet builds from start to finish. Abs also has easy answers to some of the most daunting aspects and really more than anything gives you the confidence to make a start. Even to the point of cutting T-mould slots with an Angle Grinder! Note, this is his personal channel, so there are non-arcade videos too.
Wiring demos and diagrams are excellent with Retroactive and saved my bacon too. Even though I had watched and rewatched them, once I had my arcade cabinet wired up and I eagerly fired it up. The joystick movements were all over the place, it wasn’t until I went through their videos again that I understood fully how the microswitches were working. More importantly my connections were half wired into permanent On positions. Leaving the joystick running constantly through my menus.
The kit I picked up had a Jamma harness that had been handed over to me as wired. Once I untangled it I soon worked out that it was actually a bad job. I basically disconnected it all and started again. I also threw away the very homemade Ground loom required for the LED buttons, this was particularly loose.
I’d never been a fan of LED buttons to be honest, but they were there so I ordered a couple of extra Ground cables and linked them up to the power source. It’s an extra step that could put off most novice’s, but it’s pretty straightforward once you know what’s going on. These I sourced quickly and locally from Austin Amusements in Sydney, who also supplied some spare buttons and a new Jamma harness.
In the beginning.
First up, I had to fix the paintwork, the arcade cabinet had a rough black undercoat. I knew I was planning to add artwork to most of it, based on an old Space Invaders theme I had seen. So, I sanded back and sprayed up the exposed areas. Three coats later, with a light sand in between delivered a smooth finish where the cabinet would be seen. This was very satisfying, and even though the MDF wasn’t the best surface to paint, I’m pleased with the end result.
Let there be Sound.
Before the painting began I had drilled a number of holes where the speakers were going to sit. Once the paint was dry I screwed the speakers into place and mounted the little A6 Amplifier (that came in my box of treasures) between them. Wiring this was easy, the audio jack from the Pandora Box would run into the Amp left and right inputs. The Box outputs Mono, but it feeds both, then I wired the speakers into the Amp. Because I didn’t have small enough quick connections for the speakers I had to pick up a solder iron for the first time in 30 years. That worked out well.
While the head section was open I also took the opportunity to fix a strip of white LEDs to illuminate the Marquee section. These have a switch of their own and would run off the mains board I planned for the base.
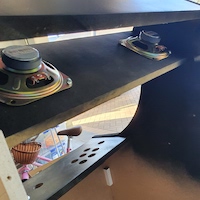
Speakers installed 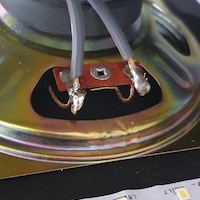
Nice Soldering 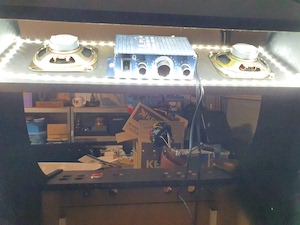
Lights, Amp, Action
The artwork cometh.
I had been scouring for artwork, and even with an artistic bent I really didn’t want to get into using Vector Art. So having come across the back catalogue for Sydney based Noodleshirt. I reached out for some old Space Invaders designs they had produced a few years back. Armed with the dimensions for my cabinet we came to a decision quickly and 7 days later I had some amazing artwork in my hands. I now had everything I needed to get started.
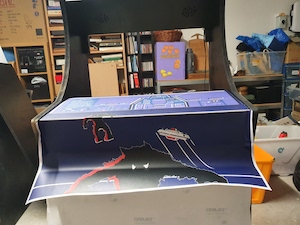
Placing the CP Art 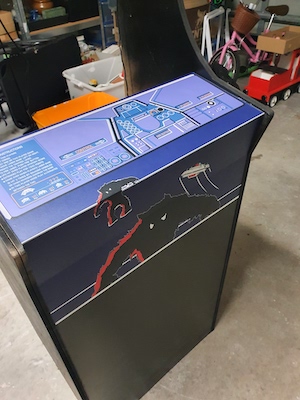
Vinyl installed 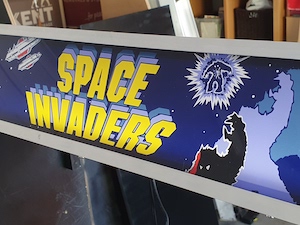
Sexy Marquee
Wiring the Control Panel.
In a sensible world you setup your Control Panel (CP) before it’s attached to the cabinet. My half-built arcade cabinet was already built, making this difficult. For reference, next time I will absolutely set up a CP that can be opened/removed for ease of wiring.
I had to work with what I had, because I certainly wasn’t going to dismantle the cabinet. Once I had the artwork for the CP, I wasn’t adding a perspex layer so I laid it directly to the sanded surface. Smoothing down the artwork and cutting the edges made everything start to feel real. Once it was in place, I sliced the vinyl to access the button holes (pre-cut) and got to work.
Once the switches are in place adding the wiring via Jamma quick connects is easy, following a Jamma diagram can get you the right colours in the right place no problem. However the Pandora Box has its own ideas of button configuration. Something you can tweak in the software, but it’s easier to match by rewiring.
A productive hour or so later I had Joysticks in position and buttons wired up. A slow process because of the CP being fixed in place, if it was accessible it would have been a game-changer. I did take the time to mark up my joystick base with a sharpie so I knew which colour wire went where, and that the Up/Down was the right way round.
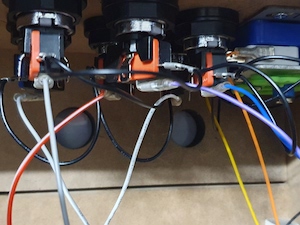
Quick Connects and Microswitches 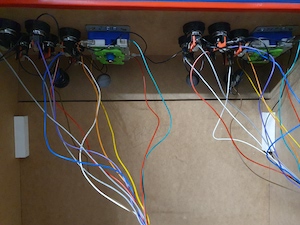
Spaghetti Junction 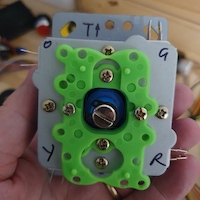
Everybody loves a Sharpie
Mounting the monitor.
The size of this cabinet can take a 19” Monitor and thankfully the Pandora Box can output to both HDMI or VGA. Following some of the steps I’d seen by Abs DelFuego I mounted the monitor on a sheet of plywood. Which I cut to fit the cabinet frame. Used the 4 holes on the rear of the monitor for a VESA mount. Drilling through the Ply and screwing into the monitor with some M4 bolts.
I then slid the frame into position and fixed it with 4 L-brackets into the side panels. Positioning the monitor is a matter of taste and while the angle may not be 100% perfect, it works for me. By time the Bezel is in place and the screen is in action, a few millimetres here or there are forgivable.
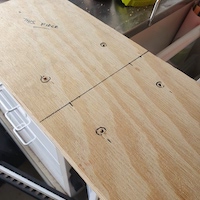
Plywood ready to go 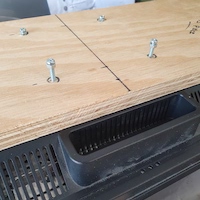
M4 Bolts onto Monitor Vesa 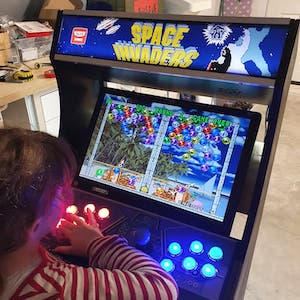
Monitor in place
Fixing the Marquee.
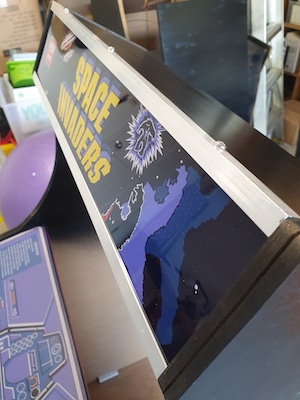
My Noodleshirt artwork also included a gorgeous Space Invaders Marquee for the head of the machine. Cut to size it has a white background at the back to diffuse the LED lighting and a vibrant front. One thing I had not considered was attaching the Marquee to the cabinet.
I had ideas, such as trying to add a groove to the head section of the cabinet that the Marquee could sit in, especially as it seemed to be a few millimetres overlong. However researching the best applications threw up some bespoke brackets overseas, which got me looking closer to home.
The answer was both simple and elegant, adding a solid industrial edge to the cabinet. Having found a strip of 4mm by 4mm corner edge in Bunnings for about $6. I pressed the Marquee into place, it held with pressure, but a little bowing. I cut the aluminum strip to fit top and bottom, pre-drilling some equally spaced holes. Then I screwed it onto the cabinet holding the Marquee in place. The end result, I think, is magnificent.
Fixed in place 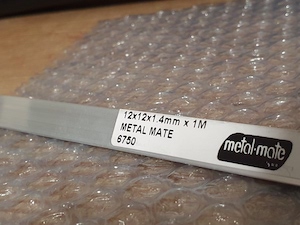
The Cheap & Elegant Solution 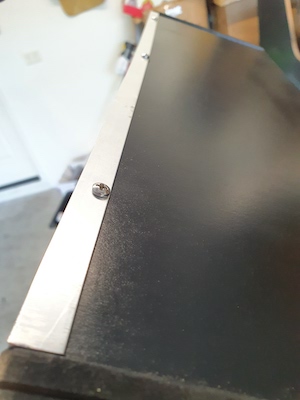
Modern Retro Industrial Finish
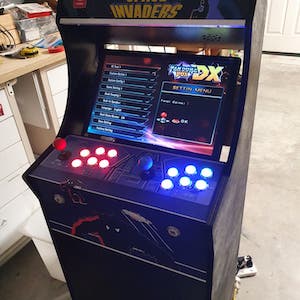
Time to play Speed Rumbler?
These steps got me to a working arcade cabinet that I could happily play with.
Albeit with an open back, untidy wiring, one more button to connect and bare sides. Next comes the really testing part, actually finishing the build. With a Bezel, final wiring, side artwork and T-moulding ahead of me there are still a few laps to go.
Although punching out a few World Records on track and Field, tends to be more enticing.
Part three of this series is coming soon.